
A fuel receipt on your phone, another for materials in the truck, and a message you still need to send to explain which site visit the expenses belong to. Gathering the supporting documents can take longer than recording the purchase.
In cebric, you can upload receipt photos or PDFs, review the data proposed by AI, and submit an expense report. You avoid retyping every field from scratch and keep the supporting documents together for the person who reviews them. If you manage the team, you can also choose pre-approvers and set automatic approval rules.
If Expenses does not appear in the employee portal, ask your administrator to enable expense access for your user. That access lets you prepare and track your reports; it does not by itself grant permission to review or pay them.
Create an expense report
From the Employee Portal, open My Expenses and select Create.
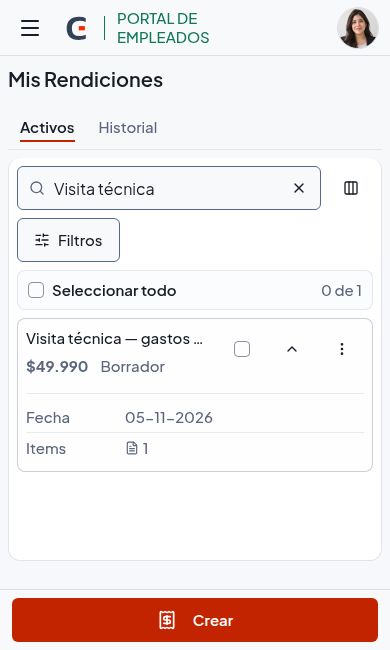
From your phone, you can check a report or start a new one.
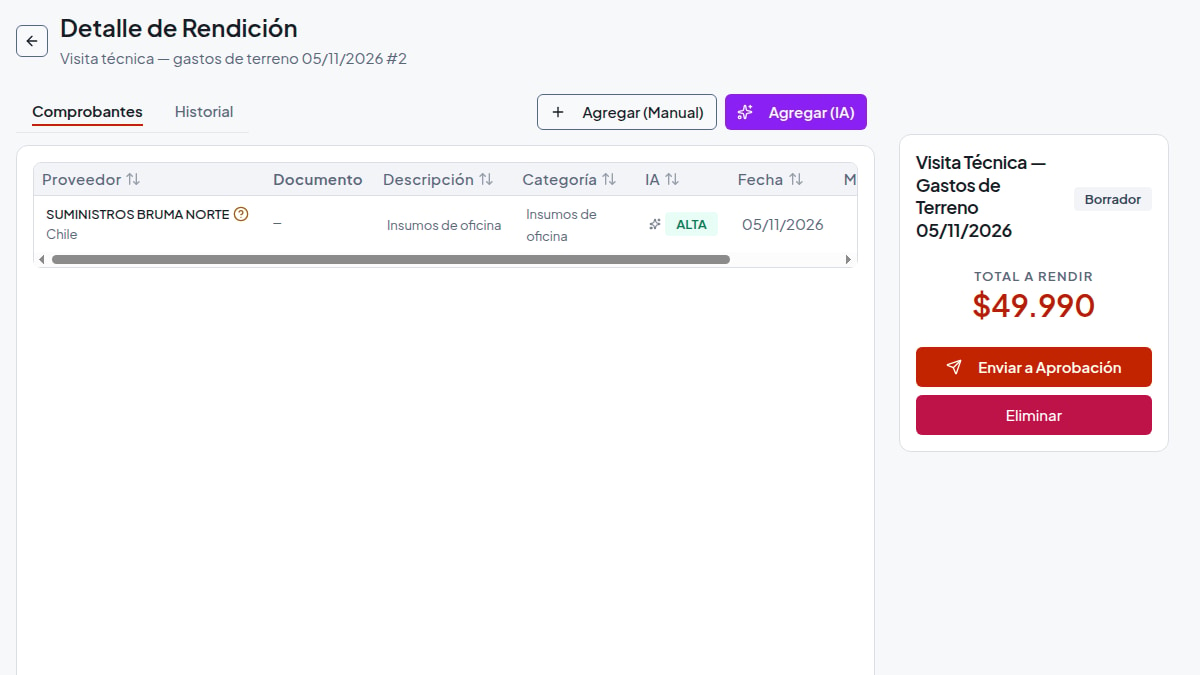
Add a description that helps you recognize the expenses, such as “Technical visit to Quilicura — November,” and create the report. This helps the reviewer identify which job the receipts belong to.
Within the report, choose Add (AI) or Add (Manual). Smart Upload accepts multiple files and can analyze images or PDFs containing more than one receipt.
Before uploading a photo, check that the supplier, date and amounts are readable. A cropped corner or glare over the total makes it harder to read. If you have no signal in the field, keep the photos and upload them once you reconnect: uploading and analyzing them requires an internet connection.
How AI analyzes your receipts and invoices
AI analyzes your receipts and invoices and suggests an expense category, such as fuel, meals, tolls or parking. It also considers notes you add to the document: it can exclude crossed-out or X-marked items from the extracted details, read quantities corrected by hand and recognize an amount to claim written on the document.
During review, you can check the details it identifies:
- Supplier, RUT or tax identifier, and country.
- Document type, number or folio, and date; time too, when it appears.
- Currency, total, net amount, and identifiable taxes.
- Products or services, quantities, unit amounts, and line totals.
- A suggested category, such as fuel, meals, tolls, or parking.
- The amount to claim when the document lets cebric distinguish it from the purchase total.
It may also capture payment details and, for fuel, litres, license plate, or odometer. What it can read depends on the document and its legibility.
Compare the result with the receipt or invoice. Correct the available fields and adjust the category if needed. Before submitting the report, review the item details and confirm the amount you want to claim, especially if you excluded a purchase or added changes to the document.
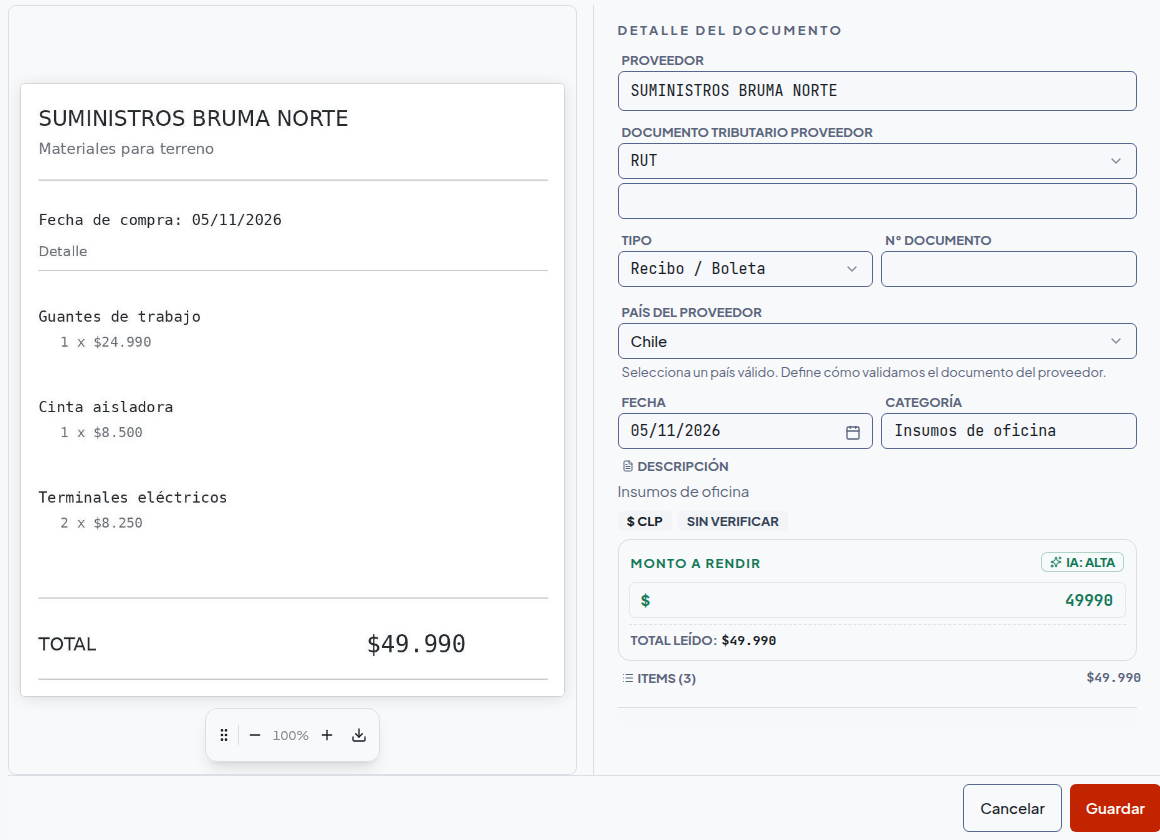
Compare the fields with the supporting document before saving; the supplier is still marked as unverified.
Check the supplier name and identifier as well. If they do not match, verify the legal name, number and country. The supplier check is explained below.
Save corrections and add the receipts
Smart Upload has two separate confirmations:
- Open each result that needs review, check the details, and save your corrections.
- Return to the list and select Save (N) to add the receipts that are ready to the report. The number shows how many will be added; results that still need review remain pending in the analysis.
Then check that the receipts appear under Receipts in the report. Closing the editor does not add them by itself.
Correcting AI data is not the same as approving an expense. A newly added receipt still needs the applicable review decision.
Confirm submission and follow the review
Once the supporting documents are in the report, select Send for Approval. The Review submission for approval screen opens: check the route, reviewers and total. Resolve any blockers shown there, then confirm with Submit report.
If the report requires pre-approval, it goes to the assigned reviewers. Approval from one of them completes that stage; Finance provides the final approval afterwards. If no pre-approval is required and the automatic rule does not apply, the report continues to the relevant final review.
If a report is returned, check the reason, make the necessary changes and submit it again. You can check its status under My Expenses; History contains paid or rejected reports.
The reviewer sees the receipts together under the same report. Its description and supporting documents make the request easier to understand without piecing it together from separate messages.
For administrators: choose who pre-approves
Go to Expenses → Settings and enable Pre-approval. Under Pre-approval settings, select users in your organization who have access to Expenses:
To enable that access for a person, use Recursos Humanos → Empleados → acciones → Habilitar rendiciones in the Spanish-language administration menu.
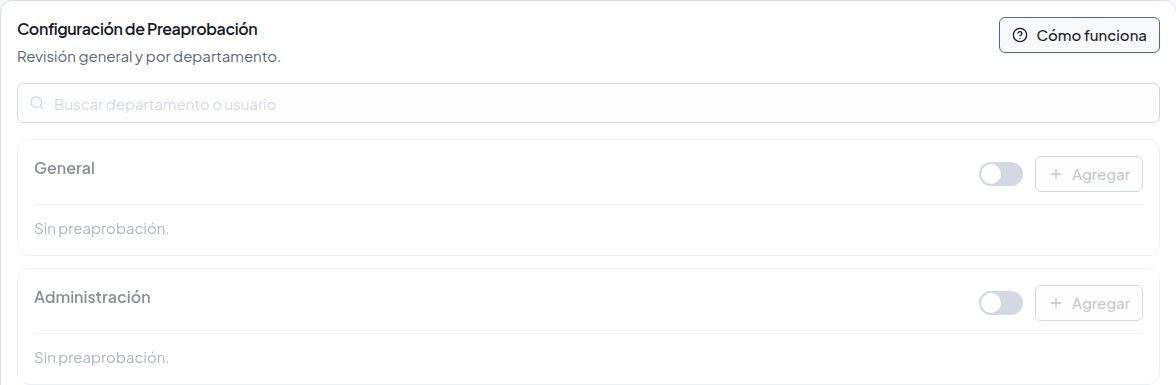
This panel separates General and departments; no pre-approvers are active in this configuration.
- Check the General list and the departments that apply.
- Use Add to search by name or email and choose the reviewers.
- Enable pre-approval for each department that needs it. A department can use General or have its own reviewers.
General is the shared list for people without a department and for departments configured to use it. Adding people to General does not automatically turn on pre-approval for every department.
You can select several reviewers as alternatives; they do not all have to approve. The person who submits the report is excluded from their own pre-approval.
Configuration changes apply to future submissions. They do not replace the reviewers assigned to reports already in progress.
Where reviewers make their decisions
Under Expenses → Review and Payments, open the report and review its receipts. Review next receipt moves the review forward. Receipt decisions and pre-approving or approving the report are separate actions; pending decisions can block approval.
When your assignment and permissions allow it, continue with Pre-approve or Approve. Permission to configure reviewers does not mean you can approve reports or record payments.
An approved report does not mean money has been transferred. A user with payment permission can choose Register Payment on an approved report to record a payment that has already been made. This action does not make a bank transfer.
What the automatic approval limit does
The limit is compared with the report total when it is submitted, not with each receipt. It is a conditional rule: setting an amount does not make every report below that limit approve itself.
This matters from the first upload: new receipts start pending. Correcting their data with AI and saving them does not, by itself, meet the automatic approval requirements. Reviewing them after submission does not run the rule again automatically.
To configure the option, go to Expenses → Settings, enable Auto-approval, set the Maximum amount eligible for auto-approval, and save.
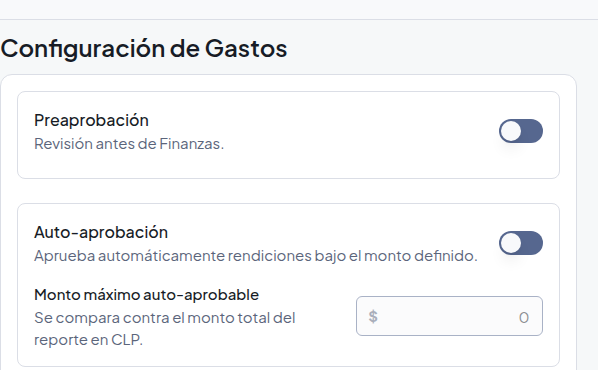
The control compares the maximum with the report total in CLP; the option is disabled in this view.
The limit is inclusive. For example, with a limit of CLP 50,000, CLP 49,999 and CLP 50,000 meet the amount condition; CLP 50,001 does not. Two receipts for CLP 20,000 and CLP 30,000 add up to CLP 50,000 for this comparison. Always compare the total and limit in the same currency.
This example only covers CLP. If a report includes a receipt in another currency, do not assume conversion: confirm that the total and the limit are compared in the same currency before enabling automatic approval. If you cannot confirm that, keep the report under manual review.
The following conditions must also be met at submission:
- No included receipt can still be pending; each must be approved, approved with a modification, or rejected.
- At least one non-rejected receipt must have a positive amount to claim.
- The report must not require pre-approval.
- The report must not be a resubmission from Returned.
Completing pre-approval does not by itself trigger final automatic approval. The rule depends on the configuration and report status, not the AI confidence badge.
What the supplier check verifies
In Chile, cebric checks the format of the RUT and compares the RUT and legal name using a public SII source. A match may come from a saved verification. When an external lookup is needed, it runs in the background and depends on the source being available.
For a foreign supplier, check coverage for its country and identifier. cebric uses different sources: VIES for VAT registration in intra-EU transactions and BrasilAPI for company data using Brazil’s CNPJ identifier.
A pending or unverified result does not mean the company does not exist. This check helps identify the supplier; it does not authenticate a receipt or invoice or determine whether an expense is tax-deductible.
Start with the expenses you need to report
If your company already uses cebric, open My Expenses in the Employee Portal and prepare a report for a visit or group of expenses you can identify. Review the reading, add the receipts and confirm submission. If you administer the team, choose the reviewers before extending the process.
If you are looking for a way to organize this work in your company, create a cebric account.
References
Related Articles
View all articles
Notifications: which documents and PPE are coming due?
Choose who receives cebric email summaries for expired or expiring documents and PPE, set the delivery days and time, and open each record from a direct link.
Read article →

First steps in cebric: getting your team started
Learn the first steps in cebric: configure your organization, invite your team, create employees, set document requirements and organize files with templates.
Read article →
cebric: less paperwork for teams working in the field
Meet cebric, the Chilean platform for worker and project documents, signatures, PPE records and mobile expense reports without going back to paper.
Read article →